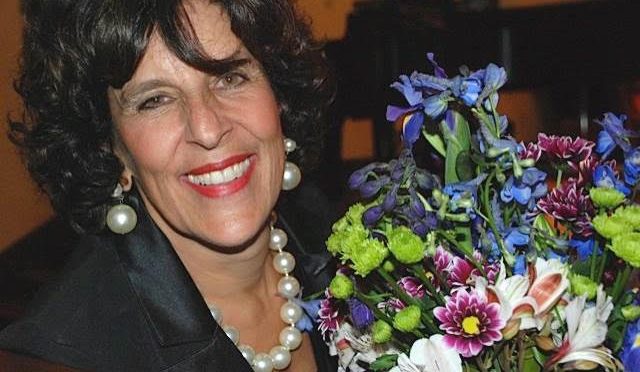
Download BBM APK App for Android FREE

Blackberry Messenger (BBM) is an instant messaging application which allows users to exchange messages over the internet. Originally, this application was developed only for blackberry devices, meaning that people who have blackberry phones can only use this application. But, Blackberry has expanded its famous application to other operating systems like iOS and Android by publishing the APK files for that.

download bbm app free for android

Messages in BBM are sent using the data connectivity one has in their phone,and it works on the pin based system.Unlike other instant messaging apps where you need a contact number in order to put them in your contact list and exchange messages with them, BBM uses pin based system.In order to exchange messages with other person you need to have his/her BBM pin which is generated when you register or sign-up for the the first time on BBM. With the release of version 5.0 Blackberry allows you to use a QR code to add your friends to your contact list rather than using only PIN based feature. According to their recent press release now you can get BBM App on your Android device also.

bbm android apk

What is BlackBerry Messenger ?

It is an messenger application that gives you the privilege to have a group chat where many users can communicate with each other in a single session.It have a large collection of emoticons which you can use to express your emotions while chatting.As I said you need to have a internet connectivity in your phone in order to send and receive messages on BBM. You can use Wi-Fi as internet connectivity option or your carrier data plan. BBM also allows you to make voice calls to your contacts over your mobile network or Wi-Fi. You can even make video calls if your device supports it. You can send images, videos, contact information, share location, etc to your friends via BBM. You will have a real time confirmation that your message have been delivered and read. Blackberry introduced a feature called BBM channels where you can comment or like the channels. You don’t need BBM pin of another person in order to discuss something on your favorite channel with other person.

Download and install BBM apk on your Android phone for FREE:

Step 1)   Make sure that your device supports BBM. It can be installed only on devices having Android version 4.0 (Ice-cream sandwich) and higher.

Step 2)   You can go to Google Playstore and install it. But as you know there are many fake applications in PlayStore so, in order to make sure that you have real BBM go to your browser and visit www.bbm.com this will take you to the official application in playstore. Click install and there you have it.

Step 3)   Sign in your app with a BBM pin if you already have it. If you don’t have it, then it will be generated for you. A BBM PIN is a 8 digit alphanumeric code. Once you have signed in, you can start connecting with your friends and family who are already on messenger.

Related : Download Best Android Emulator for Windows 7, 8 and Mac PC
Related : Straight Talk APN Settings for iPhone, Samsung, and BYOP
Related : Gmail Settings for POP / IMAP / SMTP Servers

Features of BBM ( Blackberry Messenger) App :-

BBM is mostly used big corporate people and there are around 90 million users using that, so you can imagine the popularity of this application and the service it provides.

When Blackberry announced that it will release BBM apk for android users, social media exploded with tons of discussion on this. Earlier, People who like android but have their major contacts on BBM have to keep two separate devices one for BBM and another for Android or they use to keep only a Blackberry device. But when BBM released for android,it was a big success. With millions of people buying android devices and people already having android devices started using that. They no longer need to buy a separate Blackberry device just to use messenger. This increased the popularity of Android even among the blackberry users.

Hope, you have successfully installed BBM app on your Android phone and good news is that it’s completely FREE.

Optimizing Front-End Performance for Windows Applications: A Serious Endeavor

In the realm of software development, where user experience reigns as the ultimate benchmark, the meticulous optimization of front-end performance for Windows applications emerges as a paramount task. This article delves deep into the intricate world of front-end optimization, exploring techniques and strategies that stand as the cornerstone for developers aiming to craft Windows applications marked by seamless, lightning-fast user interfaces.

Windows Applications

URL: https://unsplash.com/photos/idmvPhF8t4E

Recognizing the Criticality of Front-End Performance

Front-end performance, a term encapsulating the speed and responsiveness of a user interface, is not a mere technicality but a defining factor in user satisfaction. In the domain of Windows applications — a landscape encompassing desktop software and Universal Windows Platform (UWP) apps — the stakes are high. A sluggish interface or an unresponsive application can swiftly alienate users, undermining not only user experience but also the application’s credibility and success.

In the pursuit of impeccable front-end performance, the selection of a skilled front-end developer stands as a pivotal decision. A developer well-versed in the nuances of Windows applications can transform the user experience from satisfactory to exceptional. For those seeking such expertise, consider hiring a proficient front-end developer at https://lemon.io/hire-front-end-developers/, ensuring your Windows applications resonate with seamless responsiveness and unparalleled user satisfaction.

1. Efficient Resource Management: The Core Foundation

At the heart of front-end optimization lies the efficient management of resources. Windows applications, characterized by a plethora of elements such as images, scripts, and stylesheets, demand judicious handling. Techniques such as minification, bundling, and compression are not mere conveniences but imperatives, stripping away unnecessary bulk and enhancing loading speeds.

Moreover, advanced strategies like tree shaking and lazy loading, though sophisticated, are indispensable. These techniques ensure that resources are allocated with precision, eliminating superfluous elements and minimizing the application’s footprint.

2. Streamlined UI/UX Design: Where Elegance Meets Efficiency

A cluttered or overly ornate user interface is not merely an aesthetic concern; it can strain system resources and cripple performance. Streamlining the design by eliminating excess, optimizing graphics, and ensuring consistent styling is more than a matter of visual appeal — it’s a strategic move. It reduces the application’s load and elevates user experience, striking a delicate balance between aesthetics and functionality.

Furthermore, embracing responsive design principles is not a choice but a necessity. A design that seamlessly adapts to various screen sizes and resolutions is no longer a luxury but a standard. Users, whether on desktops, tablets, or smartphones, demand a consistent experience, and responsiveness is the linchpin in this equation.

3. Asynchronous Loading and Rendering: Enhancing Efficiency

Synchronous loading, an approach where resources load one after another, belongs to a bygone era. Asynchronous loading, where multiple resources load simultaneously, is the present and the future. By embracing this technique, developers eliminate bottlenecks and expedite the rendering process. For data-intensive applications, this approach is not just a preference but a lifeline, ensuring a seamless user experience even in the face of substantial datasets.

4. Caching Strategies: Where Speed Meets Efficiency

Caching, an often-underestimated tool, holds immense power. By storing frequently accessed resources locally on a user’s device, developers transform waiting time into instant gratification. Browser caching and service workers, the backbone of Progressive Web Apps, are not merely technologies; they are architects of speed, reducing reliance on network requests and cutting down latency.

5. Optimal API Calls: The Art of Precision

API calls, the lifeline of dynamic data in Windows applications, are both a blessing and a challenge. Precise optimization here is an art form. Techniques such as batch requests and server-side pagination are not mere conveniences; they are essential strategies for minimizing data transfer. Moreover, implementing intelligent client-side data caching ensures that redundant API calls are a relic of the past, elevating performance to new heights.

6. Efficient JavaScript Execution: Where Power Meets Precision

JavaScript, the dynamic backbone of modern interactivity, can be a double-edged sword. Poorly optimized or resource-intensive JavaScript code can cripple an application’s responsiveness. Code splitting, a technique where only essential JavaScript loads initially, and Web Workers, enabling background script execution, are not luxuries but necessities. By preventing the main thread from becoming overwhelmed, these techniques ensure swift user interactions and seamless animations.

7. Continuous Monitoring and Optimization: The Unending Journey

Front-end optimization is not a one-time task; it’s a journey without a final destination. Robust monitoring tools, the vigilant guardians of performance, stand as the silent sentinels. Google’s Lighthouse and Microsoft’s Application Insights are not mere tools; they are gatekeepers, offering insights into performance metrics. Armed with this knowledge, developers can make informed decisions, refining the application iteratively, and ensuring that it stands as a testament to optimal user experience.

In Conclusion: Where Excellence Meets Expectation

In the competitive realm of software development, where user satisfaction is the ultimate testament, mastering the art of front-end optimization for Windows applications is not just a best practice; it’s a serious endeavor. By meticulously embracing these optimization techniques, developers embark on a path where excellence meets expectation. The result? Windows applications that not only meet but exceed user expectations, fostering a legacy of user satisfaction, loyalty, and the enduring success of their creations. In this serious endeavor, front-end optimization emerges not just as a technique but as a commitment — a commitment to excellence, user satisfaction, and the relentless pursuit of perfection.

How to Design or Make a Youtube Banner Templates

Have you ever seen YouTube profile or video with some stunning banners? According to social media expert using templates on our video increase its conversion by 200 percentages. That’s why you should think to do same for your videos too; after all we are here to do some smart work and NO more hard work? Do you agree with that? I am sure; you must be agreed.

youtube banner templates maker

We can make our YouTube page more beautifully by adding some banner design. Some of user may already aware about creating and designing banner for their YouTube account. But there still plenty of peoples who don’t aware the process for creating and uploading such templates on their video. Actually, It is an extra features that YouTube.com provides to each of their member and you can get much more benefit from that feature. Do you know? Such banners are also used by the company as space for their advertisement. Ok now let me share my experience about creating stunning and beautiful banner design that you can use for your any YouTube channel to get huge number of traffic. It is not a hard and difficult step.

How to Create and design YouTube banner templates ?

Below are the simple and easy to follow steps that you can use to have an attractive banner. Before giving you steps let me tell you that, YouTube standard banner resolution is 2560 x 1440 Pixel. So you need to keep dimensions of your banner within that so that it look like professional.

  1. YouTube also provide us with the Photoshop template so we can design the right size of our banner design.
  2. We can use the adobe Photoshop to edit this banner.

Another way to create a beautiful YouTube templates is by using the third party web like banner maker. Nowadays many websites also offer the simple way to build a eye catching YouTube banner design, For example we can use the “Bannersnack” and inside that we can choose the size of the banner, texts, images, shape, and illustration to add a personal YouTube banner design. Bannersnack is very simple just a click of every element by drag and drop to move it anywhere, compared to Photoshop that you require to understand the layer, etc. It offers the ease of usage for one who isn’t really expert in photoshop, but still you can have a good and appealing banner design, if you want to try just visit the official site given here and follow the simple instruction.

Check also, How to remove Internet Explorer 10 from PC.

To add the “Channel Art” to your YouTube, make sure that you already login to your YouTube account,

  1. Open your channel page, then just simply click add channel art at the top of your channel, or for you that already have your old YouTube channel art, you can change it by clicking the icon like “Pencil” and choose “Edit Channel Art”.
  2. Upload your design banner
  3. After you’ve done the upload, you will see the preview that will appear in other devices and you need to adjust until you think it is done.

Remember that when we create the banner in YouTube it can be viewed across our devices such as a Smartphone, desktop and TV. So we recommended that you create a banner with 2560 x 1440 pixels and the minimum resolution should be 1546 x 423 pixel. Remember, when we kept that smaller it possible that some text of logo will be cut off, so make sure to check the required size and create accordingly.

Related : How to recall an email in outlook 2007

Hope you enjoyed my tips and tutorial, so implement that now and let see your YouTube channel more beautifully.

The Best Crypto Trading Platform

The cryptocurrency industry is developing by leaps and bounds. In a relatively short period, this unknown industry has captured the attention of millions of people around the world. It seems like an eternity has passed, but in fact, the first BTC was mined only in January 2009. For comparison, the first stock exchange was opened in the Netherlands back in 1602, that is, 70 years before the birth of Peter I. That’s impressive, isn’t it?

Nowadays, digital currencies are not something supernatural; with their help, you can purchase almost any goods and services, invest and be engaged with crypto trading. Therefore, the cryptocurrency market needs a convenient, safe and, most importantly, legal infrastructure. It is especially true for crypto-to-fiat exchange services. Sooner or later, all of us will resort to such services, so let’s figure out how to choose the best exchange for a beginner.

Crypto exchange is a service offering:

  • tools for trading and investing;
  • current rates and price crypto changes;
  • a variety of digital assets;
  • mobile apps.

One of the largest and most user-friendly platforms on the Internet is WhiteBIT. Let’s take a closer look at it.

Features of WhiteBIT

The platform offers over 400 digital asset pairs. Registered users may also buy crypto using their bank cards. Spot trading is available with no KYC, but a client must pass verification to access all advanced tools.

A peculiarity of WhiteBIT is that it processes users’ KYC verification 24 hours to a couple of days. Along with that, the level of security does not suffer.

It is a centralised platform where clients store their assets to their desire. The platform keeps 96% of users’ funds offline, which is an excellent way to keep them unreachable to hackers.

The interface is suitable for those who have never traded crypto. Users can adjust the exchange’s panel to their liking.

The WhiteBIT crypto trading platform allows staking, futures, trade with leverage, p2p, spot markets, etc.

Related: https://blog.getspool.com/1873/5-unconventional-ways-of-obtaining-cryptocurrency/

How to uninstall Internet Explorer (IE) 10

If you aren’t happy with Internet Explorer 10 and want to uninstall or delete IE 10 version from your Windows PC then you should follow the steps given here.

When you install the windows 7, 8 PC the default version of the internet explorer installed along with the windows. However, when your windows get updated with the server on the Windows, your internet explorer version changes and it’s become IE10. However, most of the people love to use internet explorer default version instead of the third party browsers. However, due to the updating of the window the default internet explorer converts into 10 versions.

remove internet explorer 10

Check : Fix Bootmgr missed Error

Most of the people are complaining that IE10 has so many bugs and want to remove that but they do not know the process to uninstall the IE10 and they don’t even try to find that.  We have easy to follow and simplest steps given here.

How to remove Internet Explorer 10 from Windows

please follow my comprehensive guide given to get proven solution for IE related errors.

  1. Press the window button from the keyboard or click on the start button from the windows menu.
  2. Type “programs and features” in the search of start button
  3. Click on the option of “programs and features”, a window will open in front of you, from where you can uninstall other third party software’s.
  4. Then find out the option of “view installed updates” option in the whole window of “programs and features”.
  5. Click on the option of “view installed updates” and select the IE10 updates and click on the option of uninstall a program.
  6. However, shortly the IE10 updates will remove from the windows and your explorer converts into the old version again.

Through the above process, you can uninstall the IE10. Mostly people do not use the internet explorer because there are several reasons for not to using this browser. Some of them get Registry errors and while other get error like DNS server not responding. Here are the lists of those problems those internet explorer keeps due to which people avoid using it.

  1. The first and basic problem of this browser is that, it is too much heavy and whenever you open it, along with this browser so many toolbars open.
  2. It takes a lot of time to open any website and shows many security errors whiling opening the website.
  3. A developer cannot remove the bugs of the website by using this browser because it is not compatible with programming testing.
  4. The format of the version website does not look good on this browser and most of the big website options become disabled on this browser.
  5. Even though you have very fast internet speed, but the process of this browser to open the website is very slow and take a lot of time.
  6. It’s become hang again and again and ask for the different requirement and prompt the massages.

Thus, people try to avoid using this useless browser because it consumes lots of time to proceed the website or any other command. However, it is the only way to install the other browser after doing the new installation of the windows. However, it is not the reliable browser, on which people can relay. Mostly those people use this browse, which uses the intranet application, like banks and other multinational companies.

Relate : What is Windows 7 not Genuine Error?

Congratulation! Now, you know how to get rid of IE 10 and you can successfully delete that from your computer. Please write down your inputs or any error that you are facing during above process. I will be more than happy to assist you.

The Evolution of Rap Videos: From Beginnings to the Modern Age

Rap music, with its intricate lyricism and pulsating beats, has always been more than just auditory entertainment. Its visual counterpart, rap music videos, have undergone a transformative journey mirroring the evolution of the genre itself. From the streets of New York to opulent mansions and exotic locations, rap videos have become a dynamic art form that tells a story beyond the lyrics.

The Humble Beginnings

In the early days of hip-hop, music videos were relatively straightforward. Often set in urban landscapes, these videos were more about showcasing the artist and the community than extravagant storytelling or production. The emphasis was on the lyrics, the beat, and the dance, with simple backgrounds and minimalistic setups.

Rise of Extravagance and Narrative Storytelling

As rap gained traction and started making its mark in mainstream music during the 90s and early 2000s, the videos began reflecting the success and lifestyle associated with it. Big mansions, flashy cars, and luxurious lifestyles became common themes. Additionally, rap videos began to incorporate narrative elements, often telling a story or portraying a message that complemented the song’s lyrics.

Changing Props: From Boomboxes to Drones

The props used in rap videos offer a fascinating insight into their evolution. In the early days, boomboxes, graffiti walls, and street dance formed the core visual elements. As the genre progressed, the props became more elaborate. Expensive cars, champagne bottles, mini bongs and designer outfits started making frequent appearances. In the modern age, technology plays a significant role. Drones capture sweeping aerial shots, and advanced graphics and animations enhance the visual storytelling. Even the bling has evolved – from simple gold chains to intricate diamond-studded pieces symbolizing status and success.

Embracing Diversity and Cultural Elements

Modern rap videos often incorporate diverse cultural elements, reflecting the global influence of the genre. From traditional African dances to Asian aesthetics, these videos have become a melting pot of cultures. This multicultural approach not only showcases the artist’s influences and background but also resonates with a global audience.

Social Commentary and Authenticity

Today’s rap artists are unafraid to use their platform to comment on social and political issues. Videos often address topics like racial inequality, police brutality, and mental health. This shift towards authenticity and raw storytelling makes rap videos more than just entertainment – they are a powerful medium for change.

Data Speaks: Evolution in Rap Video Budgets


Era Average Budget (in $) Notable High Budget Videos
Late 80s 50,000 “My Philosophy” by KRS-One
Mid 90s 500,000 “California Love” by Tupac
Early 2000s 1,500,000 “Victory” by Puff Daddy
2010s-Present 2,000,000 “Sicko Mode” by Travis Scott

Note: These are approximate figures and can vary based on individual artists and production choices.

This table showcases the exponential growth in rap video budgets over the years, indicating the genre’s increasing commercial success and the importance of visuals in the overall package.

Conclusion

Rap music videos have come a long way from their simple beginnings. As the genre continues to evolve, so does its visual representation, reflecting the changing times, values, and aesthetics. The modern rap video is a testament to the genre’s impact, influence, and unyielding relevance in the music industry.

How to recall an email in outlook 2010, 2013, and 2007

Recalling an email is one of best feature provided in outlook express. If you are using outlook 2013, 2010 or 2007 version in your Windows 7 or 8 PC and want this advance feature to be enabled then you should checkout the detailed steps given in this page.

When you are working in a professional environment, then it is very important to send the proper email to your co-worker or other office employer because in the professional environment people consider or justify your skills. Therefore, you have to be very conscious to do the work with your senior or junior staff. You are using your gmail id and don’t know which gmail setting would be required, please checkout my previous post about same.

recall email for outlook 2013, 2007 and 2010

Mostly this happens in outlook, while typing the email you forgot to attach any document that was very important to attach with that email. Some you have also made some mistakes in that email. However, this is the problem for that person who does not know about the features of the outlook. However, outlook provides the feature of recall the email, makes the changes in the email, and again sends to the person. However, these changes will be made in that email. It is the amazing feature of outlook, which most of the people do not know about it, however, below are the simple steps that will let you know, how to use this feature in outlook 2010, 2013 and 2007 to make your professional life easier.

Related : Steps to root Samsung Galaxy S3

Process of recall in outlook 2013

  1. If you have sent the email through outlook 2013, then you recall the email like this, client on the ribbon file and see the option of “info”
  2. Click on the option of “info” you will find the option of recall there.
  3. Click on the button of “resend or recall” button and select the option of “recall this message”
  4. Then make the changes in the email and send that email to the person to whom you want to send.

If you face any error then you should double check your setting. Sometime other configuration may clash with this feature.

How to recall an email in outlook express 2010

  1. If you have sent the email by using outlook 2010 and now you have to resend or recall the email to the client or co-worker, then click on the option of “file” from the ribbon.
  2. Find the option of “info” in the File drop down, once you find out the “info” button select the “resend or recall button”.
  3. Resend this message to the client by doing editing in the email. It is the simple process to recall the email via 2010.

Recalling process in outlook 2007

In the outlook 2007, the process of recall the message is a little bit different because the interface of the outlook is little bit change from the other version of outlook. The process of recalling is below.

  1.  Click on the “message tab” in the ribbon of the outlook and find out the option of “other Actions”
  2. Once you find out the option of “other Actions” open the drop down of “recall this message”
  3. Edit the message and recall or resend to your client.

See also : Get more followers on Instagram

Congratulation! You have successfully set your email client, so now you can send your emails without any error and no attachment issue. Please share your experience by commenting here.

GetSpool features iOS Jailbreak, Cydia Apps, Theme Reviews, Tweaks, iPhone, iPad, Apple TV and iPod news.